Data Processing
- Confirm the data has been pushed to the server and is in the correct location by completing the following in the Terminal window
- Log into DNS0:
ssh –Y username@dns0.bmap.ucla.edu
- Find data located in the following directory:
cd /Volumes/BMC9/dicom4/KNARRGROUP/ (before mid-June 2014)
cd /Volumes/BMC9/dicom5/KNARRGROUP/ (as of mid-June 2014)
- Log into ssh.bmap server and copy data to server:
ssh –Y username@ssh.bmap.ucla.edu
cd /ifs/faculty/narr/schizo/DEPRESSION/
scp –r username@dns0.bmap.ucla.edu:/Volumes/BMC9/dicom4/KNARRGROUP/<SUBJECT_ID>.
scp –r username@dns0.bmap.ucla.edu:/Volumes/BMC9/dicom5/KNARRGROUP/<SUBJECT_ID>.
- Change permissions for new files
chmod 775 -R /ifs/faculty/narr/schizo/DEPRESSION/<SUBJECT_ID>
Convert all new patient MPRAGE’s to nifti.
- Log into the cerebro-mp1 server
ssh –Y username@cerebro-mp1.bmap.ucla.edu
- Change directory to DEPRESSION/SCRIPTS: (all scripts and pipelines should be found in this directory)
cd /ifs/faculty/narr/schizo/DEPRESSION/SCRIPTS
- Run the step_1_dcm_to_nifti.sh script:
sh step_1_dcm_to_nifti.sh
- This script will look through the DEPRESSION directory for any files with DE_###_## names and run dcm2nii for those that have not yet been converted.
- The output file will be
/ifs/faculty/narr/schizo/DEPRESSION/<SUBJECT_ID>/nifti/<SUBJECT_ID>_mprage.nii.gz
- To run this script on other subject group, adjust the SUBJECTS_DIR variable:
SUBJECTS_DIR='<new_subject_directory>'
- If a subject has two MPRAGE files, manually convert the correct dicom to nifti:
- Create a nifti directory within the subject’s main directory (DE_###_##)
mkdir /ifs/faculty/narr/schizo/DEPRESSION/<SUBJECT_ID>/nifti
- Change directory to where the dicom files are located and run MRIcron’s DCM2NII:
cd /ifs/faculty/narr/schizo/DEPRESSION/<SUBJECT_ID>/ALLEGRA_MRC20108/2*/NARR_*/
dcm2nii –o /ifs/faculty/narr/schizo/DEPRESSION/<SUBJECT_ID>/nifti/ TFL_MGH_ME_VNAV_RMS_#
- Change the output file name:
mv /ifs/faculty/narr/schizo/DEPRESSION/<SUBJECT_ID>/nifti/2*.nii.gz <SUBJECT_ID>_mprage.nii.gz
Use the
step_2_freesurfer.sh script.
- Edit step_2_freesurfer.sh within DEPRESSION/SCRIPTS to include subjects to run:
vim step_2_freesurfer.sh
- To begin editing in Vim, press the "i" key for "insert mode"
- Change the subject list, to only include new subjects you would like to process:
subj_list="<SUBJECT_ID_1> <SUBJECT_ID_2>..."
- To run this script on other subject group, adjust the SUBJECTS_DIR variable:
SUBJECTS_DIR='<new_subject_directory>'
- Save changes to the script by pressing the esc key and typing :wq and hitting return
- Run script:
sh step_2_freesurfer.sh
- step_2_freesurfer.sh script will complete the initialize steps within the terminal (approximately 1 minute) and submit the complete recon-all script to the qsub server to run in parallel; do not
- recon-all takes take approximately 15hrs to complete.
Pipeline and conversion to nifti.
- Download and open /ifs/faculty/narr/schizo/DEPRESSION/SCRIPTS/step_4_FS_masking_1.pipe using Pipeline
- Open Variables window by pressing "command"+"2" or going to Windows > Variables in the top menu bar
- Change the subject ID to the new subject to be run
- Press the "play" button to start the script
- Due to the rigidity of the pipeline structure, the number of subjects to be run is determined by the inputs and output modules. There are 3 scripts (step_4_FS_masking_1.pipe, step_4_FS_masking_5.pipe, step_4_FS_masking_15.pipe) saved that will run 1, 5, and 15 subjects respectively
- The output files will be found in /DEPRESSION/FS_temp/<SUBJECT_ID>/mri/:
| aseg.nii.gz | mask_LH.nii.gz | PVC_RH.nii.gz |
| brainmask_auto.nii.gz | mask_RH.nii.gz | ribbon.nii.gz |
| combined_mask.nii.gz | mask_WM_LH.nii.gz | T1_automasked.nii.gz |
| dist_q_LH.nii.gz | mask_WM_RH.nii.gz | T1_masked.nii.gz (used for structural analysis) |
| dist_q_RH.nii.gz | PVC_LH.nii.gz | T1.nii.gz |
- Within the DEPRESSION/SCRIPTS directory, edit step_3_dti.sh to include subjects to run:
vim step_3_dti.sh
- To begin editing in Vim, press the "i" key for "insert mode"
- Change the subject list, to only include new subjects you would like to process:
subj_id="<SUBJECT_ID_1> <SUBJECT_ID_2>..."
- To run this script on other subject group, adjust the SUBJECTS_DIR variable
dep_home="/ifs/faculty/narr/schizo/DEPRESSION"
- Save changes to the script by pressing the esc key and typing :wq and hitting return
- Run script:
sh step_3_dti.sh
- The DTI script completes all three sections of the previous pipeline by submitting a DTI_all.sh script to the qsub server
- The following output files should be created within the <SUBJECT_ID>/DTI directory:
| 34raw | DICOMdir2ANA_2.SlicepresAIR-1.air* | md.hdr |
| 37raw | dti2_temp* | md.img |
| axial.hdr | DTIStudio_tensors.hdr | radial.hdr |
| axial.img | DTIStudio_tensors.img | radial.img |
| BET | dti2_temp | ra.hdr |
| bval.txt | fa.hdr | ra.img |
| DE_309_04_4D_bet.hdr | fa.img | Rstats.hdr |
| DE_309_04_4D_bet.img | grad71.diff | Rstats.img |
| DICOMdir2ANA_1.SlicepresAIR-1.air* | Gradient_Table.txt | |
| *temporary files | | |
- Open Voxel_Calculation_Sample.xlsx spread sheet
- Create a list of subjects to calculate voxel composition for
- Complete each column using actual data locations (do not assume it exists). Use the sample table below to locate the correct data;
- Subjects may have multiple T1's or MRS runs for a particular ROI. Use the DE_SCAN_LOG database to identify which run to use. If there are no notes, use the last run MRS (DICOM which ends with the largest number)
- For subjects without a MRS for an ROI, type "None"
| Pipeline Input Modules | Sample Data |
| Subj ID | DE_121_02 |
| Hippo L (NWS) | /ifs/faculty/narr/schizo/DEPRESSION/DE_121_02/ALLEGRA_MRC20108/20120914/NARR_DEPRESSION_1/SVS_VNAV_NWS_LT_HIPPO_19/1 |
| Hipp R (NWS) | /ifs/faculty/narr/schizo/DEPRESSION/DE_121_02/ALLEGRA_MRC20108/20120914/NARR_DEPRESSION_1/SVS_VNAV_NWS_RT_HIPPO_25/1 |
| Dorcing (NWS) | /ifs/faculty/narr/schizo/DEPRESSION/DE_121_02/ALLEGRA_MRC20108/20120914/NARR_DEPRESSION_1/SVS_VNAV_NWS_DORCING_31/1 |
| Subcing (NWS) | /ifs/faculty/narr/schizo/DEPRESSION/DE_121_02/ALLEGRA_MRC20108/20120914/NARR_DEPRESSION_1/SVS_VNAV_NWS_SUBCING_37/1 |
| sMRI dicom | /ifs/faculty/narr/schizo/DEPRESSION/DE_121_02/ALLEGRA_MRC20108/20120914/NARR_DEPRESSION_1/TFL_MGH_ME_VNAV_RMS_4 |
| T12T2fs_air* | /ifs/faculty/narr/schizo/DEPRESSION/MRS_TISSUE_SEG/T1native2T2fs_invert.air |
| T1 masked | /ifs/faculty/narr/schizo/DEPRESSION/FS_temp/DE_121_02/mri/T1_masked.nii.gz |
| Voxel Mask Directory* | /ifs/faculty/narr/schizo/DEPRESSION/MRS_TISSUE_SEG/tmp/ |
| Pipeline Output Modules |
| Output directory | /ifs/faculty/narr/schizo/DEPRESSION/MRS_TISSUE_SEG/DE_121_02 |
| All Tissue Volumes CSV File& | /ifs/faculty/narr/schizo/DEPRESSION/MRS_TISSUE_SEG/all_volumes_MMDDYY.csv |
* Entries for these modules should be the same on each line but equal to the total number of subjects
& Only requires one entry
- Download and open step_5_MRSvoxelcalculate_MMDDYY.pipe using pipeline (located in the DEPRESSION/SCRIPTS directory)
- Paste in each column from the spreadsheet to the appropriate module, checking that the number of inputs on each module is the same.
- Press "Play" button to begin pipeline
- Output CSV file can be found in /ifs/faculty/narr/schizo/DEPRESSION/MRS_TISSUE_SEG/
- TBM pipelines are located in /ifs/faculty/narr/schizo/DEPRESSION/SCRIPTS/TBM/
- Within the DEPRESSION directory, create a TBM directory to place all newly generated files
mkdir /ifs/faculty/narr/schizo/DEPRESSION/TBM
- Making a TBM Atlas:
- Download and open TBM_Make_Atlas.pipe in pipeline
- Open the "Raw Data" module and paste in a list of each subjects' T1_masked.nii.gz with complete directory location:
ex: /ifs/faculty/narr/schizo/DEPRESSION/FS_temp/DE_143_02/mri/T1_masked.nii.gz
- Open the "1st Subject" module and paste in the first entry of the "Raw Data" module
- Open the Variables window by pressing "command"+ "2" or going to Windows > Variables in the top menu bar. Change the dir variable to /ifs/faculty/narr/schizo/DEPRESSION/
- Make sure the pipeline will be run on the BMAP server:
- Open the Server Changer by pressing "command"+ "d" or by going to Tools > Server Changer
- Change the Select option to All Components
- Select medulla.bmap.ucla.edu from the drop down and press Change
- Press the "Play" button to start the script
- Creating Jacobians:
- a. Download and open TBM_make_jacobians.pipe in pipeline
- b. Open the "original input (Data)" module and paste in a list of each subjects' T1_masked.nii.gz with complete directory location. This will be the same list of input as the "Raw Data" module of TBM_Make_Atlas.pipe
- Volume Regression Analysis: requires jacobians for all the subjects you want to include.
Checking freesurfer files:
- Open a terminal window and log in to the NRB server
- ssh -XY @ssh.bmap.ucla.edu
- ssh cerebro-mp1:
ssh -XY <user_id>@cerebro-mp1.bmap.ucla.edu
- go to freesurfer file directory: (the command "cd" changes directory)
cd /ifs/faculty/narr/schizo/DEPRESSION/FS_temp
- set the directory to your current one:
setenv SUBJECTS_DIR /ifs/faculty/narr/schizo/DEPRESSION/FS_temp
(if using bash shell, use: SUBJECTS_DIR=/ifs/faculty/narr/schizo/DEPRESSION/FS_temp)
- open freesurfer's image viewer Tkmedit
tkmedit brainmask.mgz -surface lh.pial -aux-surface rh.pial
Checking freesurfer files:
- Open a terminal window and log in to the NRB server
ssh -XY <user_id>@cerebro-mp1.bmap.ucla.edu
- go to freesurfer file directory: (the command "cd" changes directory)
cd /ifs/faculty/narr/schizo/DEPRESSION/FS_temp
- set the directory to your current one:
setenv SUBJECTS_DIR /ifs/faculty/narr/schizo/DEPRESSION/FS_temp
submit the following commands:
- aparcstats2table --subjects DE_???_?? --hemi rh --meas thickness --skip --tablefile rh_aparc_stats_MMDDYY.txt
- aparcstats2table --subjects DE_???_?? --hemi lh --meas thickness --skip --tablefile lh_aparc_stats_MMDDYY.txt
LCMODEL DATA ANALYSIS:
General login: *****
Launch VMware
Open Fedora –wait, click play
Login: ******
Launch a terminal
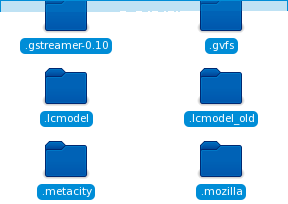
cd .lcmodel/
To open lcmodel:
./lcmgui
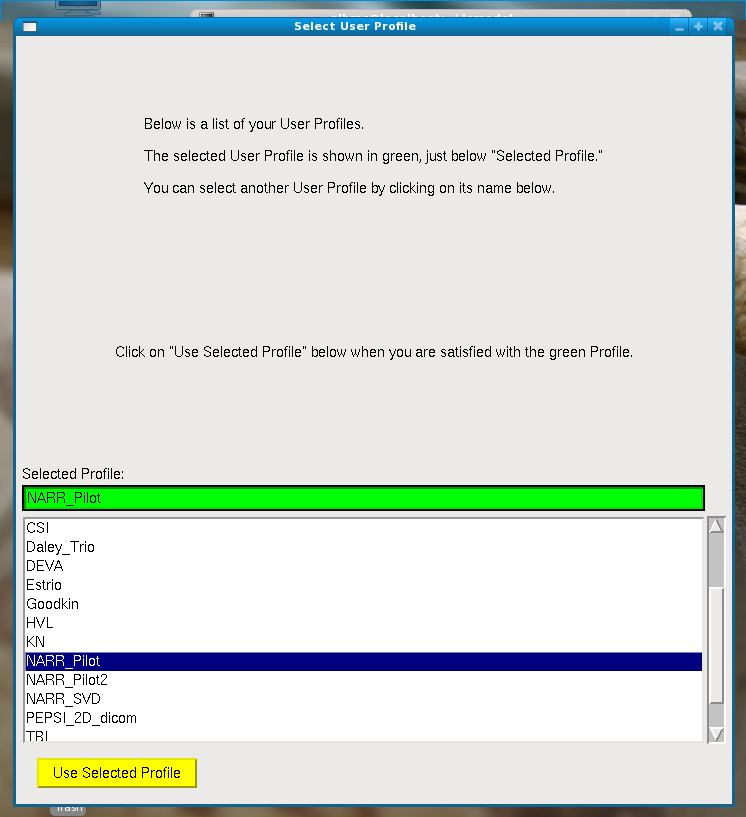
Select user Profile –
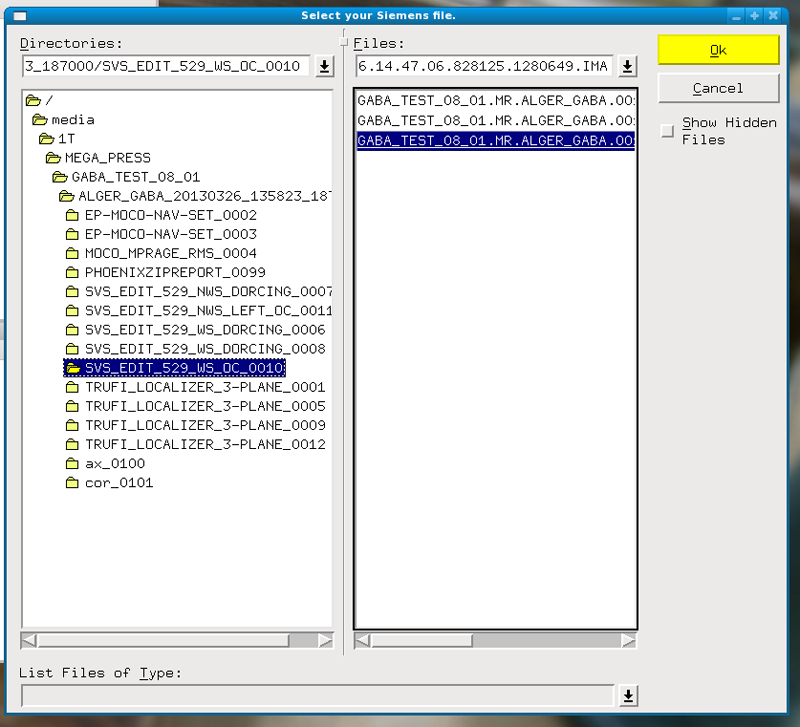
Select Siemens file – go to root and media to open flash
Open 1st WS file
Asks for NWS file – go to root and open file
run lcmodel – next analysis
Exit
Notes:
Can preview the data
3 outputs- ps, csv and table
covert ps to pdf in another terminal
drag ps to desktop
ps2pdf
For rating data:
SNR < 4 is bad
FWHM > .1 ppm is bad


