Creating 3D Object Art
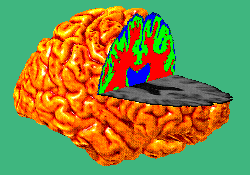
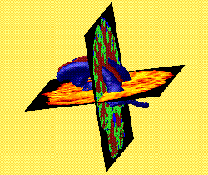
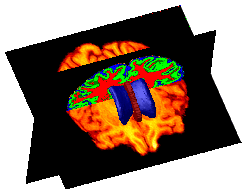
It is possible create many beautiful objects and figures using Display and Seg. By following the instructions below, you can produce figures such as those shown here. This protocol is modified from the protocol by J. Moussai (http://www.loni.ucla.edu/ad/AD_protocol/Animation.html). Click on any images to enlarge.
- Creating a hemisphere object with a cut-out cross-section
- Labeling cut-out hemispheres with
 |
 |
 |
| Note: These pictures are courtesy of Dr. Katherine Narr and Dr. Arthur W. Toga. It is unlawful to replicate, reprint, or copy these images without their prior written permission. |
Cross-sections
Creating an object with a cross-section is a fairly simple procedure, but can be difficult to visualize. In order to make a cross-sectioned object, you will need a mnc file for the brain and the corresponding object model (for the hemisphere or otherwise).
- Load your mnc and your object in Display.
Display 10704_n3_305_6p.mnc 10704_n3_305_6p_480_R.obj
- Adjust the color intensities, and determine the planes through which you would like to make cuts. This may be determined by first loading an activation map as a label on your minc, determining the slice numbers for the activated region of interest, and then reloading your minc with the object file.
- Set the paint label to 10 by clicking Space F (Segmenting) D (Set Paint Lbl).
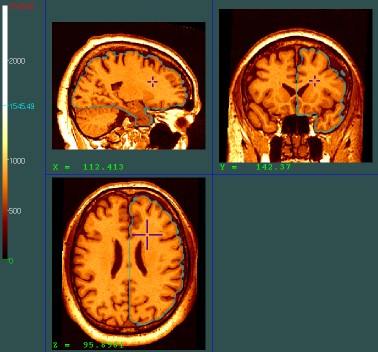
- Create an outline of the object on the minc file by clicking Space R (Objects) W (Scan Object to Vol). For a hemisphere mask, the minc should look similar to the image below (see the greenish-blue outline?).


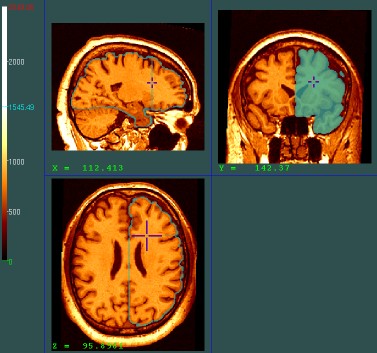
- Notice where the crosshairs are. If we wanted to create a cut so that you could see through to the middle part of the brain (moving posteriorly through the coronal view) and keep the bottom part of the frontal lobe, you could cut here. To make "cuts", simply fill in the label of the particular slice where you wish to cut off the object that will be rendered. For example, we will create a cut in the coronal plane by filling in the label as below. To fill an area, either paint over it by right clicking, or press Space F W to fill in the area contained by your brain outline. Be sure to keep your cursor in the area you wish to fill. Note the sagittal and axial views.

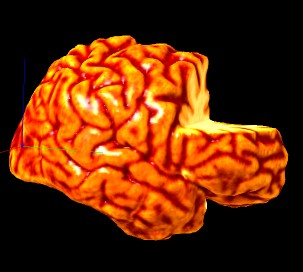
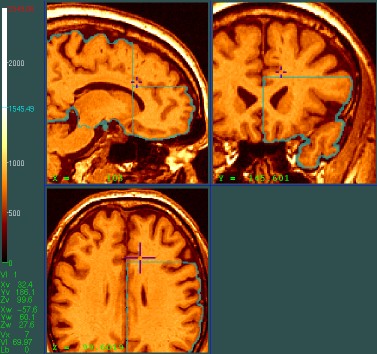
- We will make another cut in the axial view. The final object should look like the first 3D image at the top of this page.

- Now, to make sure that we don't render any of the area that was cut out, we need to go in and edit the slices just superior to the axial view and just anterior to the coronal view. Next, clear any labeling in the cut area of these slices (see below).

- Now save the labels (Space T W) so that if the object rendering fails, you won't have to create the cuts again. Save as something like [subj_id]_frontal_cut_mask.mnc (or whatever makes sense to you).
- To create the new object (with cut out section), we must first remove the other (template) object from view. To remove the object (don't worry, you're not deleting the file), click Space R Q B.
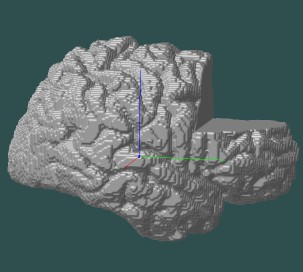
- Now, render the object from your mask by clicking Space G G. Enter 9 11 when it asks for min and max inside value. This means that anything with a label between 9 and 11 (we labeled our mask using greenish blue, color 10) will be used for the surface extraction. Watch in the object view as your object is being rendered... this can take a minute or two. Object rendering happens from the anterior to the posterior end of the brain. Your object will look something like the object below.

- To make this object look nicer, we're going to change the lighting and then smooth the polygons. To change the lighting press Space R(Objects) A (Change Surface Pro). You will be asked to type ambient (0-1), diffuse (0-1), specular (0-1), shininess (0-100), and opacity (0-1) values. Type "0 1 1 90 1" for a more shiny, bright object. You can play around with the values to get shinier or more matte objects.
- Smooth the brain by typing Space Z C.
- To color your brain, turn the label opacity down (unless you want a greenish tinge to your brain) by clicking Space D C and then typing "0.000000001" as the opacity value. Then change the color intensity on the minc by using the sliders and choosing a color type from the color coding menu (Space D). For this example, our minc is already colored in hot metal, so we'll use that.
- If you wish to change the background, you can do this too. Just click Space E Q and then type the name of the color (black, blue, red, etc.). Voila! Brain with cutout!
