Load DTIStudio Tractography Files in DTIStudio
Written by Owen Phillips. Email Dr. Katherine Narr if you have any questions. This protocol explains how to load preprocessed DTI data in DTIStudio and view tractography. For more information on identifying white matter tracts using DTIStudio, see http://narr.bmap.ucla.edu/protocols/. *Note* This protocol was written specifically for a NeuroAnatomy class, however, it can be used as a reference on how to load tractography data in DTIStudio.
Note: Tractography shown in this protocol was performed in DTIStudio using 30 direction diffusion data.
- Open DTI Studio.
- Click on File and choose Fiber Tracking.
- Click on FA - Map: and select your FA.dat file.
- Click on Principal Vector: and select your EV_0.dat file.
- Check the parameters. For the NeuroAnatomy class they should be as follows.
- Image Dimension: Width 192, Height 192. Image Slices: 55, 55.
- Voxel Size: Field of View - Width: 240, Height 240, Slice Thickness: 2.5.
- Slice Orientation: Axial
- Slice Sequencing: Inferior-Superior
- Start Tracking: if Fractional Anisotropy > 0.2
- Stop Tracking: if Fractional Anisotropy < 0.2, if Tract turning-angle > 70.

Click OK.
- Click on the Image Tab down at the bottom Right of the Program. Click on Image Processing - Color Map. Select Eigen Vector - 0 and Anisotropy - FA. Click Ok. This changes your image from a fractional anisotrophy (FA) image to a color direction map where fiber direction is assigned a color based on the direction within a voxel (red =medial/lateral, blue = ventral/dorsal, green = anterior/posterior).

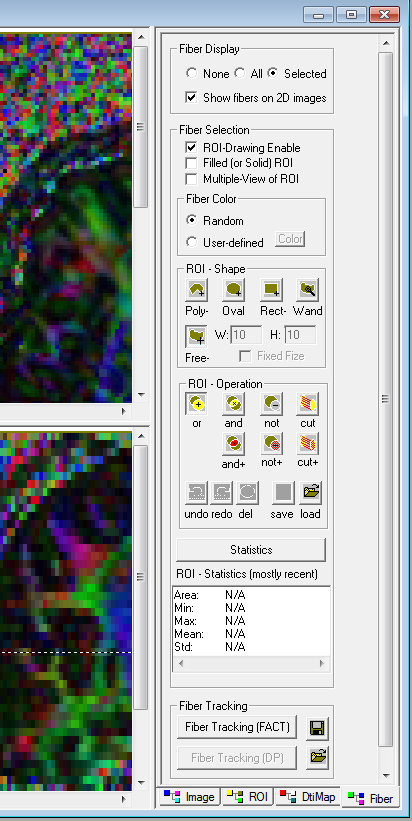
- Click the bottom right tab - Fiber. Select the following options on the right hand command panel. Fiber Display = Selected, show fibers on 2D image. Fiber Selection = ROI - Drawing Enable. Fiber Color = Random. ROI - Shape = Free. ROI Operation = or.

- Use the ROI tool and circle the corpus callosum on the mid sagittal slice.

- Identify the Arcuate Fasciculus.


