Running FEAT in the LONI Pipeline
Written by Liberty Hamilton, March 24th, 2008. This protocol explains how to run FEAT (fMRI Expert Analysis Tool) in the LONI Pipeline using our group's FEAT pipeline module. This module calls FSL version 3.3.11 on cranium. Email Dr. Katherine Narr if you have any questions. For more information, see the protocols page.
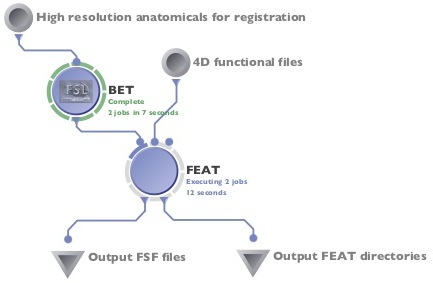
Running FEAT in the LONI Pipeline.
Download the Pipeline Module for FEAT
Right-click and select "Save as" to download: FEAT_loni.pipe
Preprocessing
You may wish to do some of this preprocessing in the Pipeline, although fslmerge (for concatenation of 3D functional images into a 4D file) may be tricky to do for multiple subjects at once.
- Convert your DICOM images to Analyze format.
- Skull strip your high-resolution structural image (for use in within-subject registrations) using bet or your favorite skull-stripping method (this could be done easily in your pipeline workflow as in the figure at right).
- Concatenate your 3D functional images using avwmerge (in FSL 3.3) or fslmerge (in FSL 4.0.x).
> cd /path/to/functional/images
> avwmerge -t subj1_fmr4D_raw *.img
Setting Up Your Design File
Because of the way the pipeline module is structured, you are still required to use the FEAT GUI once to create a model design file. For lower level analyses with our group's pipeline module, it is assumed that all parameters are kept constant across subjects, and that the only inputs that will change will be the high resolution anatomical, the functional images, and the output directories. TR/TEs should be the same, number of volumes in the 4D file should be the same, standard atlas images should be the same, timing files should be the same, etc. Note that the images below of FSL are examples only, and that your analysis should be tailored to the parameters for your specific data set.
- Run FSL on your local machine. You can create the design file using FSL 4--it doesn't actually matter because the format of the resulting .fsf file is the same. However, FSL 3.3 and up have some additional parameters in the design file that do not exist in earlier versions, so use only 3.3 and up.
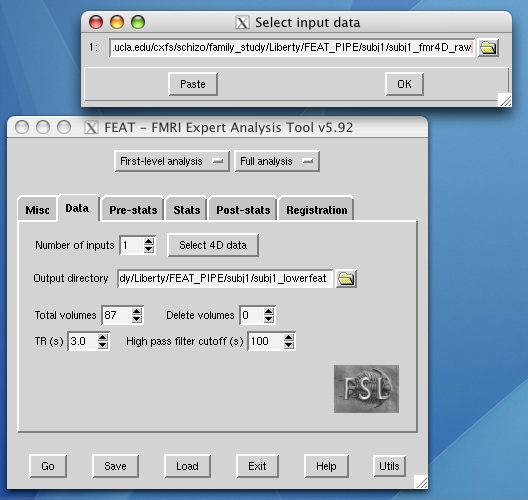
- Select "First-level analysis" and enter your 4D fmr input. The total volumes number will be filled in automatically for you. Enter your TR, high pass filter cutoff, and the number of images to delete from the beginning of the 4D file (if you use three localizer images at the beginning, for example, you would want to delete these).
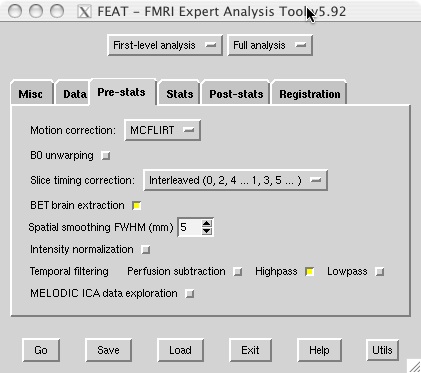
- The example shown below uses a 1-column timing text file to specify which volumes encode rest versus task, but you can use whichever waveform shape works best for your design.
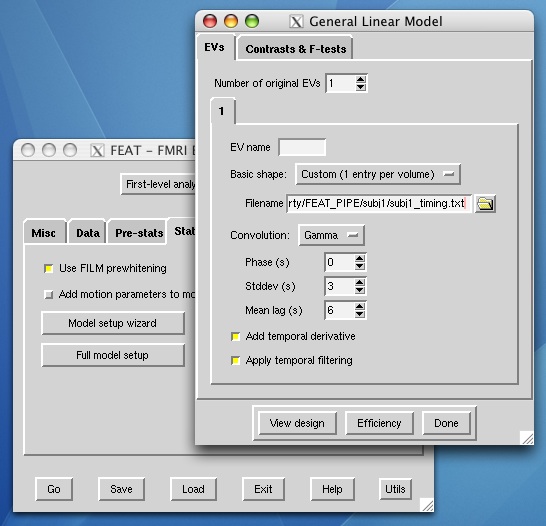
- After you have entered your block design, custom text files, etc., fill out the inputs for the main structural image (used in a rigid body transformation within subjects) and the atlas image (12 parameter affine transformation). These two inputs will be able to be changed in your pipeline across subjects.

- Save your design file by clicking the "Save" button and saving as a .fsf file. This can now be used as an input to your pipeline module.
Creating a pipeline workflow for FEAT
Here is the easiest part... running the pipeline itself! If you need to skull strip your images, you can add a BET module to feed into the high-resolution anatomical parameter (see the first figure on this page), otherwise, you can run FEAT by itself.
- Open up the LONI Pipeline and connect to cranium.loni.ucla.edu with your username and password.
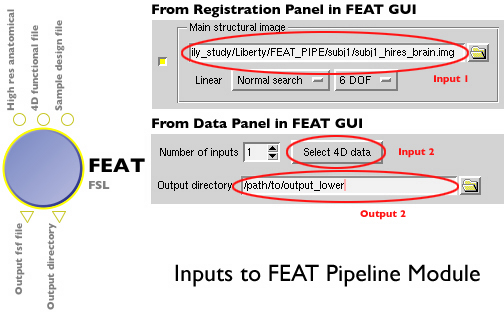
- Open up FEAT_loni.pipe and add your high resolution input (must be on a filesystem accessible by cranium--/ifs or /cxfs, for example) for the registration, 4D functional file for analysis, and your sample fsf file that you generated in the steps above. You can use data sources and data sinks to specify multiple cases, and in each case the line containing a reference to your 4D functional file or high-res structural file will be replaced with data for the subject of interest. Inputs to the FEAT pipeline module are the same files that you would input into FSL's FEAT GUI as shown below:
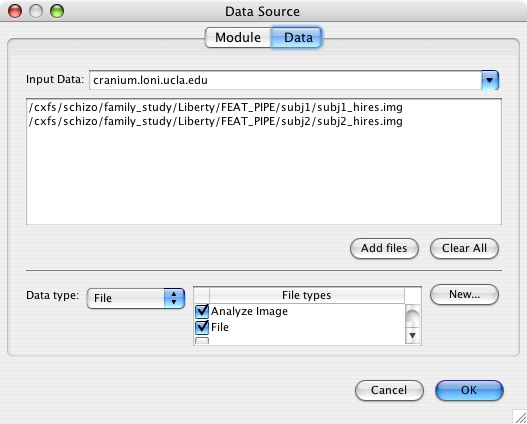
This is an example of a data source input (high resolution anatomical files) for running the same lower level analysis on two subjects.
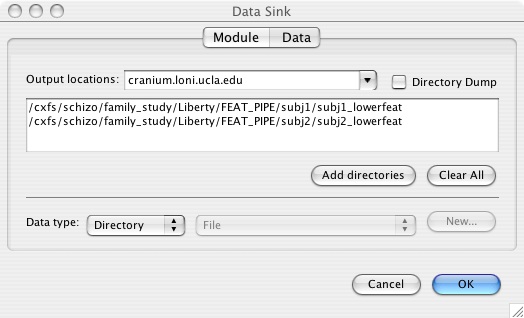
- Enter your output fsf file (which will contain the new inputs that you specified from the input parameters) and the name of the output FEAT directory. Importantly, this directory name should not contain a .feat extension, as this will confuse the Pipeline into thinking it is a file rather than a directory. You can add .feat back later if you wish, but for now, leave it out. Do not choose directory dump unless you don't mind using the randomly generated directory names that the Pipeline assigns to your temporary files.
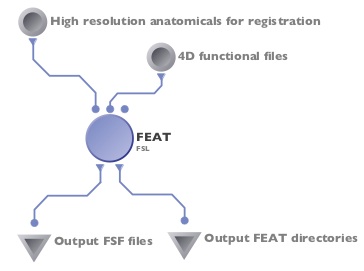
- Your finished pipeline might look something like this (or like the first figure if you're including a skull stripping BET step):
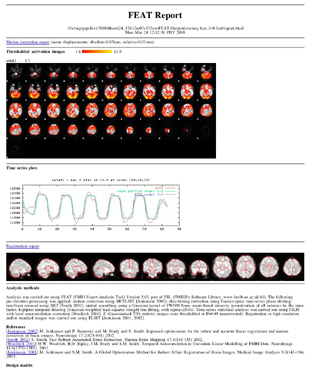
- Be sure to check your outputs by checking report.log for errors and looking at report.html to see your registration and statistical results!!
Known Issues
- Not tested for .nii files
- FSLMerge is difficult to implement in the pipeline for multiple subjects and thus probably has to be run on the command line first.
- Doesn't yet work with FSL 4.0.3.
- Currently runs lower level analyses only (though Arash has created a module to handle higher level .gfeat FEAT analyses).
- At the moment the atlases directory in FSL 3.3.11 has some extra files that shouldn't be there... best to copy the atlas you want (in ANALYZE FORMAT ONLY!!) to the directory of your choice.
- Make sure you have files of only one format (keep mincs, .nii in another directory) in your analysis and atlas directories--multiple file formats screw up FLIRT registrations because file suffixes are stripped off during processing!
How Does the Script Work?
The bash script underlying the FEAT module works by setting up the environmental variables needed for fsl to run (FSLDIR, then sourcing the Analyze version of the fsl configuration file). For example, the following two lines in the script export the correct directory for FSL 3.3.11, and then source the relevant config file:
export FSLDIR="/usr/local/fsl-3.3.11_64bit"
. /usr/local/fsl-3.3.11_64bit/etc/fslconf/fslAnalyze.sh
Next, a find/replace is done using a Java version of the stream editor sed, called Jsed, which was written by Arash Payan, a member of the LONI Pipeline team. Find/replace is done using your input and output parameters, where lines in the sample design file are changed to reflect the parameters for your subject of interest.
Each parameter in the pipeline module is represented by a number. The first input is $1, the second $2, the third $3, etc., followed by outputs. Basically, the order of the arguments on the command line will determine the variable number. Below is an example where we are replacing the line in the design file saying set highres_files(1) "blah.hdr" to set highres_files(1) "[pipeline parameter 1]".
/usr/local/java/jdk1.6.0_02/bin/java -jar /usr/local/loniJars/jsed.jar -search "set feat_files\(1\).*" -replace "set feat_files\(1\) \"$2\"" -file $3 > $4.tmp
The new fsf file is written into the output you specify in the pipeline ($4), and then feat runs using that new design file.
/usr/local/fsl-3.3.11_64bit/bin/feat $4
Everything on /ifs/tmp is then copied to the output directories you specify in the second output ($5).


